Building a True "Custom" Keyboard
Ergonomic Keyboards
UPLOADED ON
November 1, 2024
TECHNOLOGY
What Got me Interested
I was browsing through social media and I always kept getting popped up with these posts about split ergonomic mechanical keyboards that are either hand-wired or had custom PCBs. They looked very exciting to build but hard to to learn and use if all the keyboards you have ever touched were the standard ones. Well I built one. In fact, I built two.
Hand-Wired Keyboard
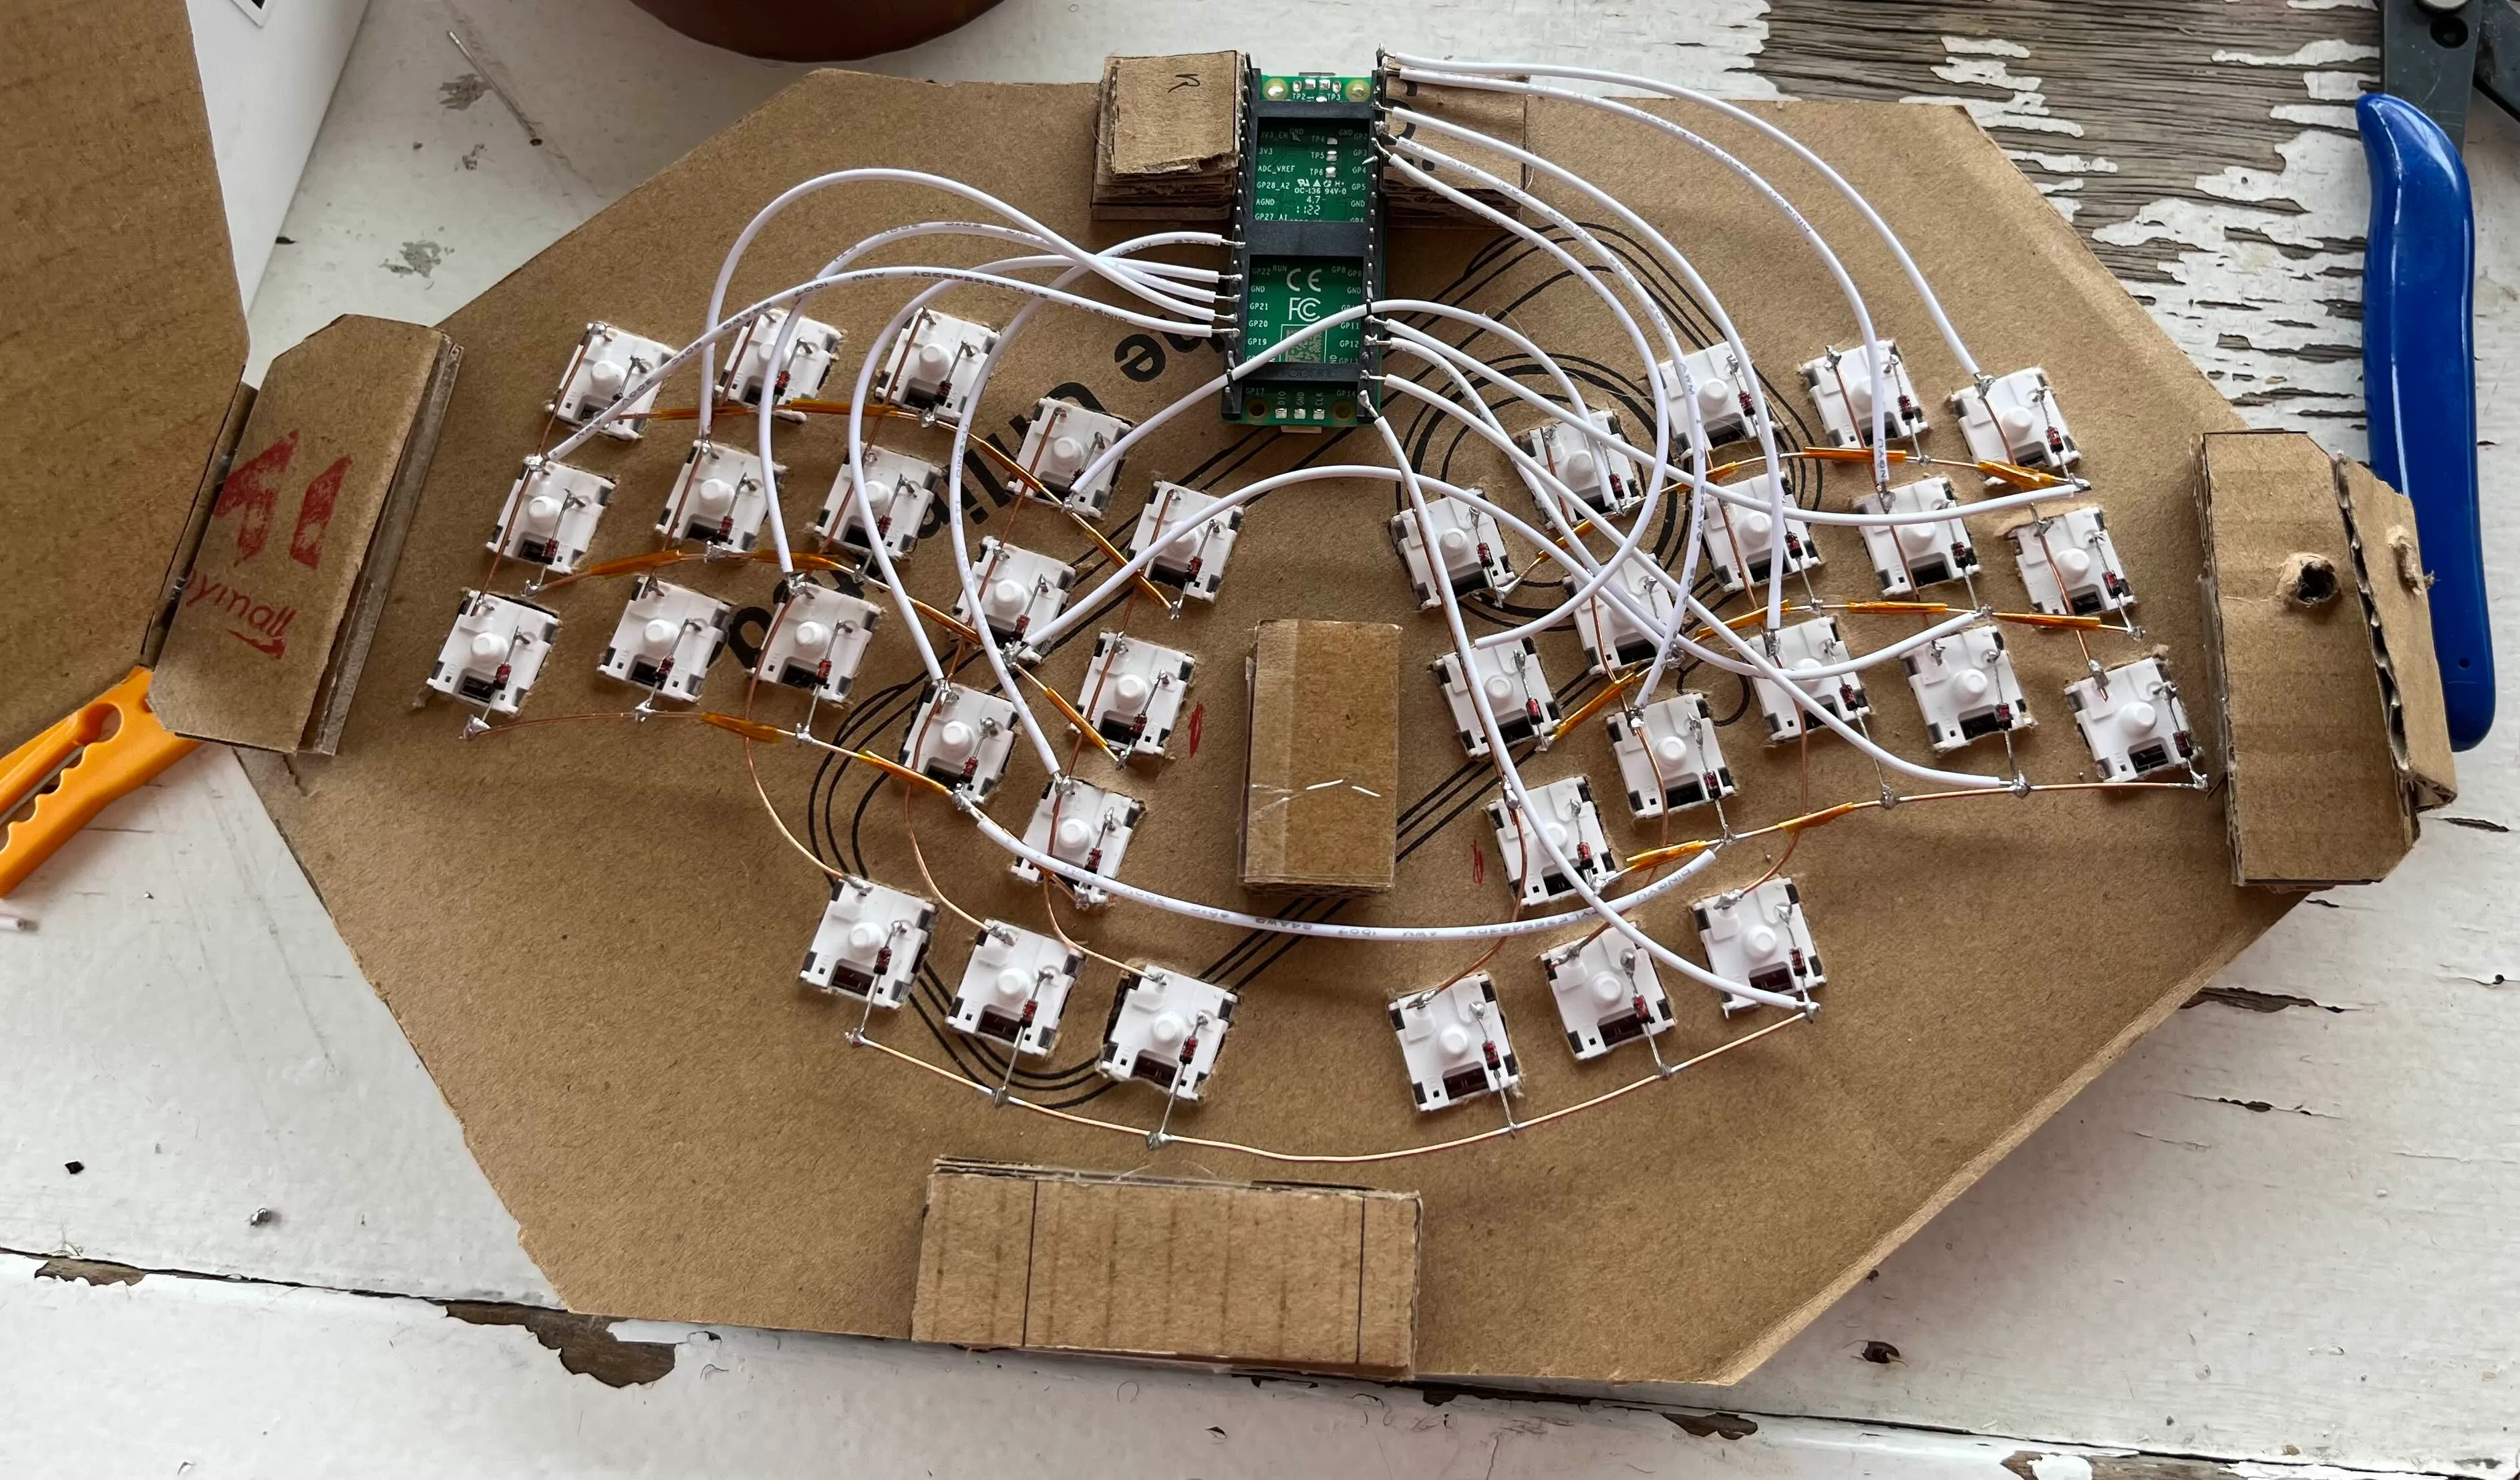
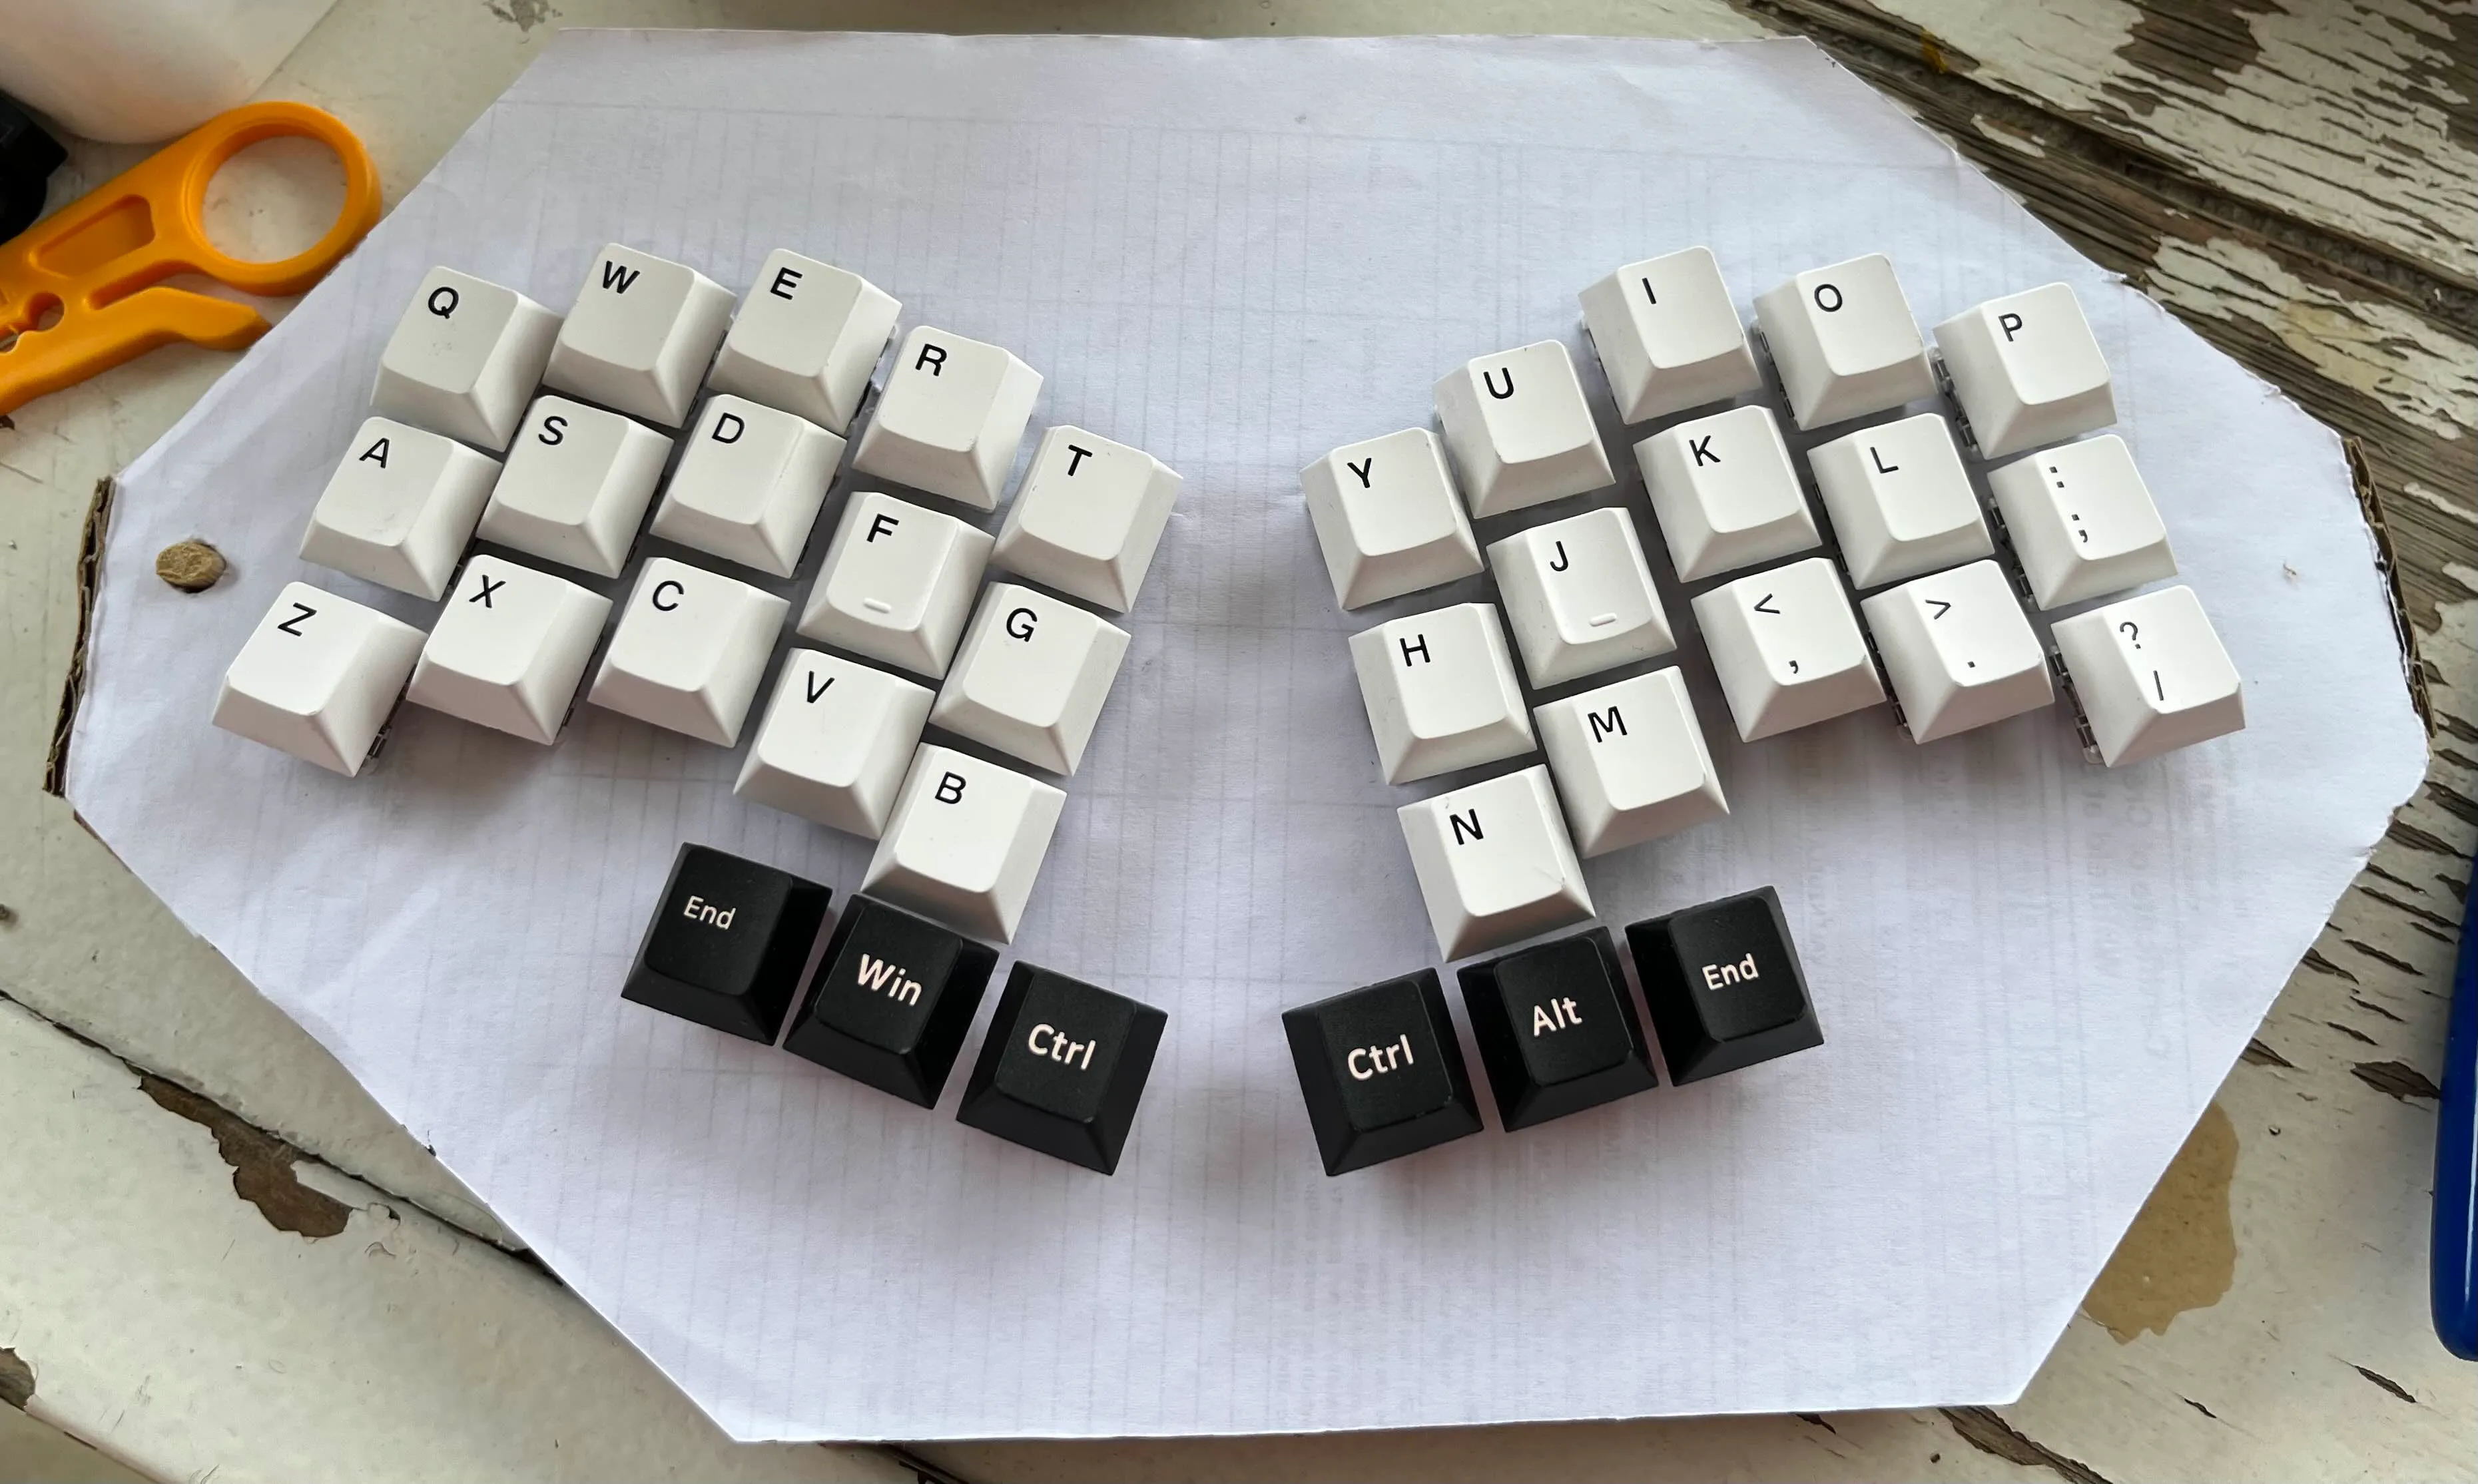
I tried my hands first at building a hand-wired keyboard since I already had experience in soldering under my skills. I learned from Joe Scotto’s video on How to Build a Handwired Keyboard. The only materials I needed to buy to make the keyboard, was the micro-controller (Raspberry Pi Pico) and some 1N4148 diodes. I already had the keycaps, switches, copper wire, kapton tape, and some cardboard for the casing in my inventory. I went with some normal linear red MX switches that came with my Keychron K6 Pro. I used GMK Olivia clone keycaps. I then decided to use cardboard for the casing because I did not own a 3D printer. For the keymap and layout, I just used the ScottoErgo with MicroPython for the firmware. The result was... bad, to say the least. Some keys kept getting ignored, while others had keys that kept getting repeated. Totally a bad soldering job by me. After working out the quirks, the typing experience was still pretty horrible.
Cantor MX Keyboard
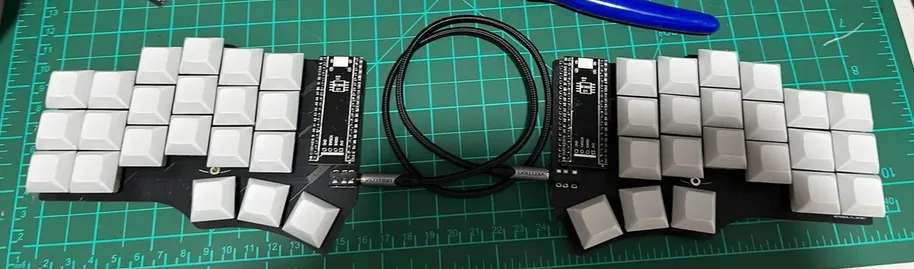
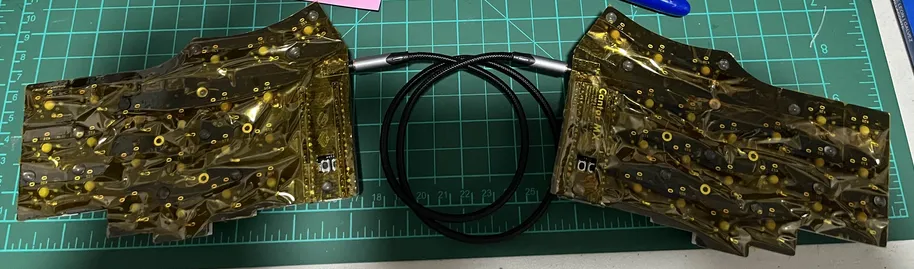
To take things to the next level, albeit being a bit more expensive, was to order a custom PCB. The one I decided to get was the Cantor MX because of the number of keys and the compatibility with normal MX switches which reduces the need to buy new ones. I ordered the PCB from JLCPCB which is a very well-known eletronics manufacturer. On top of that, in Shopee, I had to order 2x Blackpill micro-controllers, a TRSS cable, 2x TRSS jacks, DSA keycaps, and some new soldering tools and materials to make the job easier. Once I got the PCB, I started working on soldering the micro-controllers to their pin headers, then soldered those to the PCB directly. The next part was soldering the switches to the PCB which definitely took most of the time since I included 2 faulty switches in there (should have checked them first). Finally, after putting on the keycaps, I needed to decided to choose a good base keymap that I can customize. I ended up choosing this keymap by jpcairesf that was inspired by the crkbd/markstos mapping.
The Experience
While I would say it was fun building them, I wouldn’t say they are very practical for my needs. I’m an IT student who is very keen on stability, compatibility, and the out-of-the-box experience. This keyboard, while very ergonomic and probably good for my hands, will probably confuse me when the time comes to use a client’s or workspace’s normal keyboard. This keyboard also needs more time for me to adjust it and make it fit my needs rather than it be a one-size-fits-all solution. While I like the customization, I don’t like how it needs so much tuning to be productive with.